Crooked Arms External Chair
Setup Guide & Troubleshooting for BO6/WZ4 Crooked Arms External
Disable Overlays:
Turn off all overlays (Discord, GeForce, Medal, Radeon, etc.).
Disable Secure Boot:
Disable Any 3rd Party Firewalls
Download Loader
Follow the steps in the loader!
Note: They have many different game options but we only support their Call of Duty product.
How To Use Controller:
Whats Needed:
Controller / Gamepad / Joystick (connect via USB or Bluetooth)
One of the programs for key mapping:
DS4Windows (for DualShock/DualSense from PlayStation)
JoyToKey (universal for any controller)
AntiMicro (simple and free alternative)
DS4Windows Setup:
Works with DualShock 4 / DualSense (PS4/PS5) controllers.
Download DS4Windows from the official website.
Run the installer → the app will prompt you to install drivers, click Install.
Plug in your controller via USB or Bluetooth.
Your controller will appear in DS4Windows.
Click Edit on the detected controller.
A full controller diagram will appear → click the button you want to bind.
Assign a keyboard key (for example, Right Mouse Button for aim).
Save the profile → now pressing the controller button will act like a keyboard key.
JoyToKey Setup:
Works with any controller or joystick.
Download JoyToKey from the official website and launch the program.
Connect your controller.
Press any button on the controller → the corresponding input will be highlighted in JoyToKey.
Double-click the highlighted input → assign a keyboard key or mouse action to it.
Save the profile.
Now the controller buttons will work as keyboard keys or mouse actions.
AntiMicro Setup:
Download AntiMicro from the official website and launch the program.
Connect your controller or joystick via USB or Bluetooth.
In the main AntiMicro window, a diagram of the gamepad with buttons will appear.
Press any button on the controller → the corresponding button in the AntiMicro interface will be highlighted.
Click on the highlighted button and choose the keyboard key or mouse action you want to assign.
Repeat the process for all necessary buttons.
Save the profile → now pressing the buttons on the gamepad will work like keyboard keys or mouse actions.
Troubleshooting:
Please,change boot mode to UEFI in BIOS Error
The computer can boot in two modes:
Modern "UEFI" mode: supported by almost all computers after 2010 release;
"Legacy": for older computers running
How to change BIOS from Legacy to UEFI?
there are many descriptions on the Internet, instructions on how to do this
Example: https://docs.microsoft.com/ru-ru/windows/deployment/mbr-to-gpt?source=recommendations
Open command line.
In the "Run" window, type the cmd command (you can also do this through the task manager) - open cmd (command prompt) as administrator.
Copy and paste the following command: mbr2gpt.exe /convert /allowfullOS
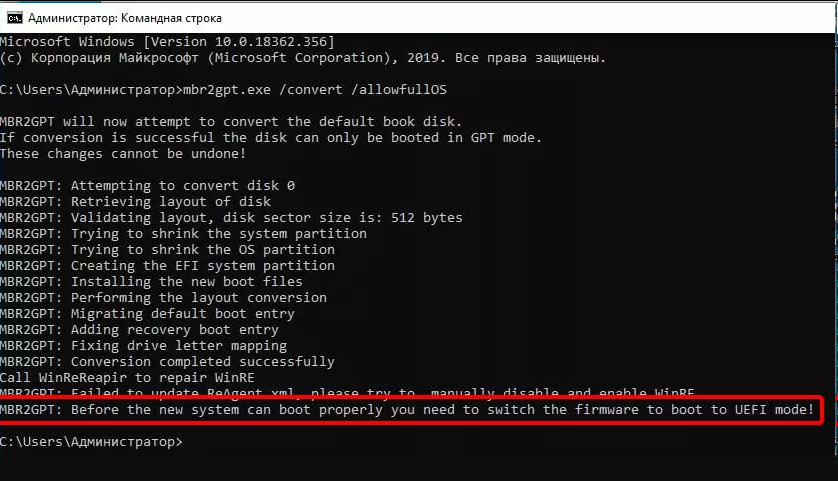
After we turn off the PC and go into the BIOS.
How to enter the BIOS?
You need to press a certain key on the keyboard, or a combination of keys, it depends on the computer manufacturer.
To go to the BOOT menu on a desktop computer, press the Del key at boot, in rare cases - F2.
The parameters we need are in the BOOT section, at the top of the list. We go to this section, and look for the "Storage Boot Option" parameter - set it to "UEFI". There should also be a parameter "Other PCI devices" - also set to "UEFI".

Note: if you did not find these settings in this section, most likely the manufacturer of your motherboard has moved these items somewhere or have a different name. In this case, do not worry, just go to Google and write the following query: ("name of the manufacturer of the board / model" legacy to UEFI)
Restart your system and try again (Hyper-V) Error
Go back to step 7 of the guide. You did not disable Hyper-V
Please, disable Secure boot in BIOS Error
Go back to step 6 of the guide. You did not disable Secure Boot
Please, enable Vt-x in BIOS Error
Go back to step 2 of the guide. You did not enable Virtualization
(Game Launcher Name) has been forcefully teminated! Error
Do not try to load with game open or launcher open.
The error means that the Launcher software closes the game process - because you have a software launcher open - because it is impossible to launch the Launcher of the game when the Launcher of the software is open
Note: you cannot run the cheat launcher when the launcher and the game are open and running and when the game is open
Attempting to do this can lead to a ban. You should always restart PC and make sure games/launchers are fully closed before opening the software's loader.
Unsupported OS version Error
If you encounter this error, it means that your OS version is not supported
Go back to our website, find the product, and press view product information and if you're winver isn't supported you need to downgrade or upgrade to the supported ones.
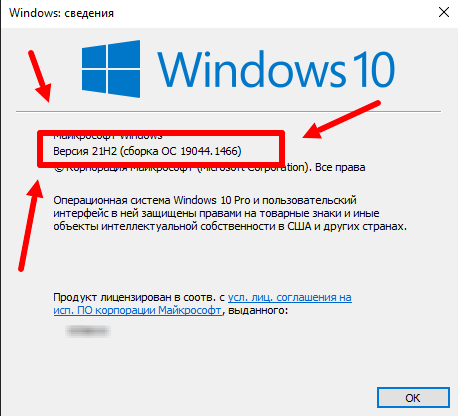
** How to find it ...
   Press the key combination Win + R, insert the WINVER command into the field, and press Ok.
Error Solution
Reinstall Windows
Upgrade or downgrade to the appropriate version
Hardware Component Has Changed
The error appears if you:
Added PC components
Removed PC components
Rearranged PC components in places
Used a spoofer
If you add, change, rearrange something, it all changes your original binding.
No need to say I didn't touch anything, my HWID changed by itself. (this can't be!!! if there are no changes, this error will not appear)
If you need to reset the HWID, then provide all the information in a support ticket :
You need to provide the following:
Login (email), the key is required!
Reason for resetting HWID;
If the reason is a change in components, then write what exactly has changed. The more correct data you write, the more likely it is to be reset.
Expect a response (no need to spam everywhere)
Provide the correct information about the HWID reset to one of the listed people:
In the message, you must specify all the data.
If you do not provide the information there will be no response to the message! We will not waste time and drag out every word from you!
Failed To Launch #2 Error
DISABLE or DELETE MANDATORY
Disable antivirus ( Remove!!! )
After removing the antivirus, restart your PC (check for antivirus traces and remove them)
Disable SmartScreen
Disable Windows Defender


Additionally
Remove FaceIt and Vanguard
FaceIt - this is a separate anti-cheat game CS:GO
Vanguard - this is an anti-cheat game Valorant
If you had them before, check all traces that could remain
Disable msi afterburner
Use VPN
Failed To Launch #4 Error
Disable windows test mode
Restart the PC
The Secondary Logon service must be enabled
Press Windows Key + R.
Type services.msc into the Run window.
Click OK.
In the Name column, locate and right-click Secondary Logon.
Select Properties.
Under the Startup Type dropdown menu, select Automatic.
Click OK.
Check whether all defenders, antiviruses, etc. are disabled and there are no traces of them left
DISABLE or DELETE MANDATORY
Disable antivirus ( Remove!!! )
After removing the antivirus, restart your PC (check for antivirus traces and remove them)
Disable SmartScreen
Disable Windows Defender
Additionally
Remove FaceIt and Vanguard Read here: Read more
FaceIt - this is a separate anti-cheat game CS:GO
Vanguard - this is an anti-cheat game Valorant
If you had them before, check all traces that could remain
Disable msi afterburner
Use VPN
Replacement DNS (perhaps your provider blocks access)
Dev Error
Many people think this is a cheat error, but they are wrong!
Most often, errors appear after game updates (sometimes the next update helps).
Some proven fixes and causes:
Lower graphics settings – the game is experiencing a RAM leak, which can only be fixed by the developers themselves.
Disable cross-platform support in the game settings.
Disable "overclocking your PC" in the BIOS and your graphics card settings.
Very important: disable background applications such as MSI Afterburner, AutoHotKey, EVGA Precision X1Punto Switcher, and ASUS GPU Tweak II (if enabled).
Try disabling AMD Radeon Relive (or any other Radeon app) in the bottom right corner to make sure it's not there.
Similarly, disable the "Nvidia Control Panel" near the clock.
Disable "Game Mode" in Windows 10, if enabled.
Reinstall shaders – there's a "Reinstall shaders" option in the game settings.
Check the game for broken files, and It's better to delete the game files except for the folders (they weigh 200 MB), but they will be redownloaded and perhaps the ones you need will work.
Vcruntime140.dll Error
Reinstall DirectX drivers
ContentAccessDenied Error
Option #1
You need to use a VPN
After the successful launch of the software (turn off the VPN, only then start the game).
Option # 2
Change DNS networks
Last updated